
In part one and part two, we began the process of hosting an application based on ReactJS, Spring Boot, and MySQL inside of AWS. We secured a domain name, obtained a digital certificate, hosted our database in RDS and hosted our Spring Boot application in Elastic Beanstalk. We’ll finish up in this post by hosting the ReactJS client and testing out the entire stack.
We’ll use CloudFront to host the client. CloudFront is a content delivery network (CDN) that provides more control than a pure S3 solution. However, S3 is still involved; CloudFront sources the static content from a S3 bucket.
S3
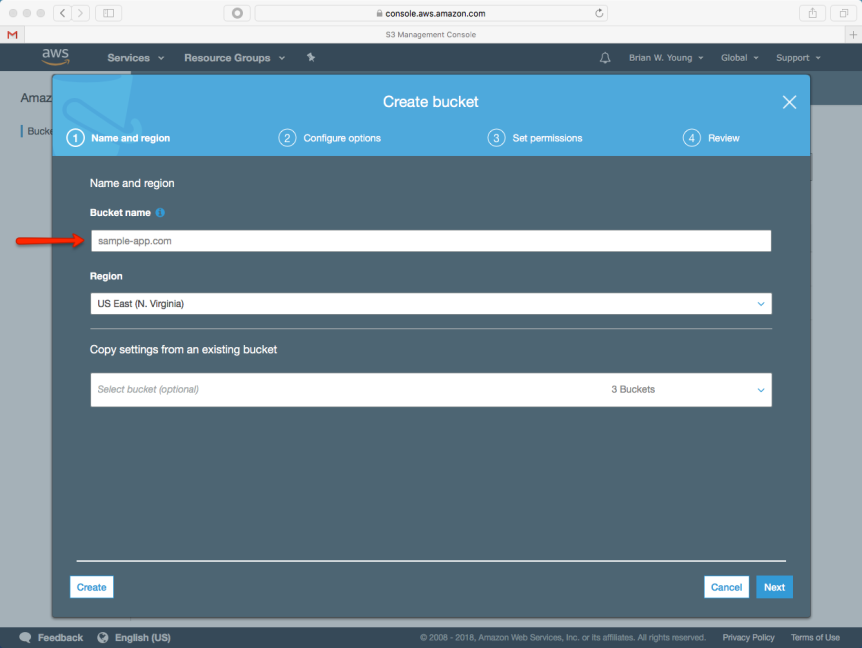
First, we need to create a S3 bucket. The name of this bucket must match the hostname that we intend to use- in this case, “sample-app.com”.
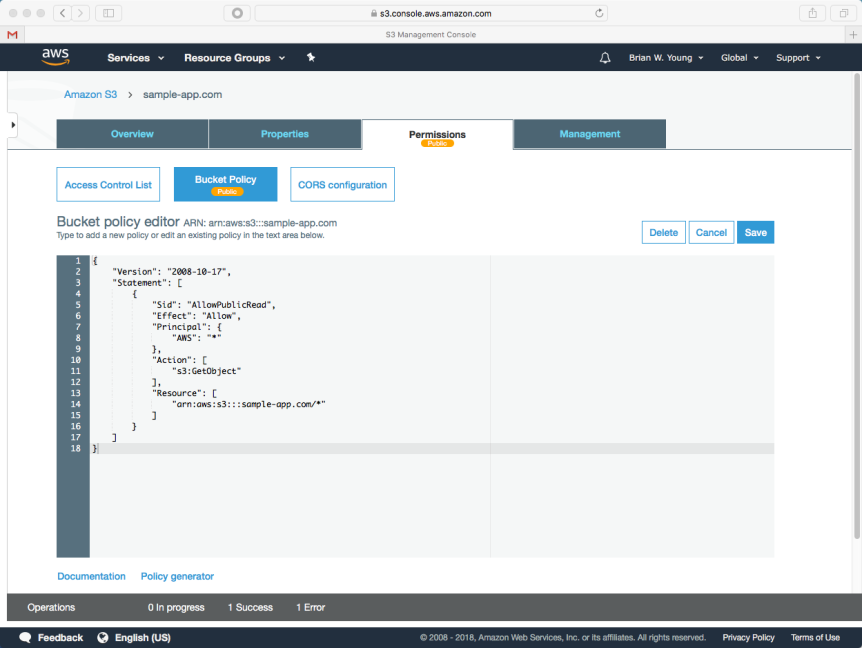
The content in the bucket must be publicly readable. The best way to handle this is by setting a custom bucket policy for everything in the bucket:
{
  "Version": "2008-10-17",
  "Statement": [
    {
      "Sid": "AllowPublicRead",
      "Effect": "Allow",
      "Principal": {
        "AWS": "*"
    },
    "Action": "s3:GetObject",
    "Resource": "arn:aws:s3:::sample-app.com/*"
    }
  ]
}
Web hosting also needs to be enabled on the bucket. This option is found on the bucket’s Properties tab.

Now, we need to build and upload the front end content.
We simply need to execute npm install and then npm run build to build the sample ReactJS client. This produces a build directory containing the content we need to host in our S3 bucket.
The front end content can be uploaded to the bucket via the AWS web console or via a third party application with S3 support such as Cyberduck.
CloudFront
Now that our S3 bucket is set up and populated, we can move on to creating a web distribution in CloudFront. The following settings need to be provided during setup:
- Origin Domain Name: .s3.amazon.com. In our case, sample-app.com.s3.amazon.com
- Viewer Protocol Policy: Redirect HTTP to HTTPS, since we do not want our users to access the site insecurely and as a courtesy want to redirect them if necessary.
- Alternate Domain Name: the domain that our users will visit to access our site- sample-app.com
- Custom SSL Certificate: the previously created digital certificate
- Default Root Object: index.html


Route 53
We need to make one final visit to Route 53 in order to create a new alias record that points to our CloudFront distribution.

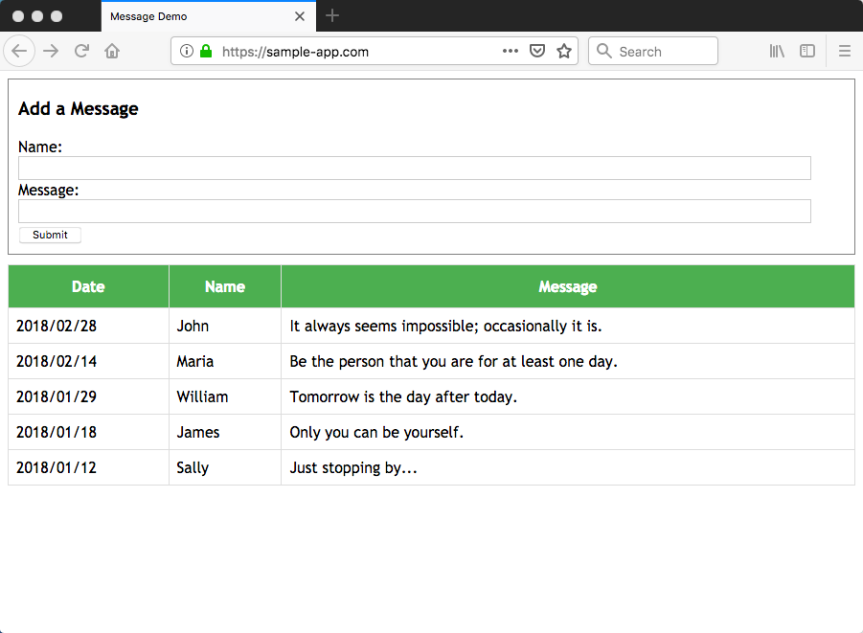
Test Drive
Our site is now up and available. Content is being served securely, the front end is communicating with Spring Boot, and Spring Boot is communicating with the database.
Conclusion
A variety of options are available for hosting a full application stack inside AWS. We used RDS, ElasticBeanstalk, and CloudFront in this walkthrough. Some of the benefits of this approach include:
- The AWS ecosystem can be fully leveraged:
- Additional services integrate seamlessly, e.g. CloudWatch or any of dozens of other AWS services
- Solution can scale as needed without rearchitecting anything
- Commonly desired features are built in; e.g. RDS backups, version management within Elastic Beanstalk, etc.
- Less setup and ongoing maintenance than other options
- Has a tendency to be more secure, since most of the elements that need to be secured, patched, etc. are managed by AWS
This application stack could also be hosted directly on EC2 instances. Or, the application could be containerized; multiple strategies are available for hosting containerized applications within AWS.
Hopefully, I’ve provided you with helpful insight into one of the options.

Hello, I try deploy my react + spring boot app to aws and I use your tutorial. In react js app I have every request with BASE_URL variable with value http://localhost:5000 to redirect me to spring boot app, but when I try login I get error ‘This site is unreachable. The localhost server refused the connection.’ that’s why I have question. In BASE_URL variable in react app should be “http://api.sample-app.com” ? Because when there is localhost nothing works. Thanks for reply.
LikeLike
Hi- are you running your own instance of the Spring Boot app in AWS? If so, you’ll need to change the BASE_URL to point to the address or URL of the app.
LikeLike
Yes, I changed it and this error does not occur now, but it still doesn’t work. I get CORS error 403 OPTIONS. I have enabled in CloudFront: Allowed Http Methods: GET, HEAD, OPTIONS and Cache Based on Selected Request Headers WHITELIST -> Authorization, Accept, Origin, but 403 OPTIONS still occurs. Have you got any idea how configure CORS for elastic beanstalk app ? There is spring boot app deployed.
LikeLike
I have not run into that problem, but you might try a more exhaustive approach in the Spring Boot app, e.g. introduce a configuration class:
@Configuration public class CORSConfig implements WebMvcConfigurer { @Override public void addCorsMappings(CorsRegistry registry) { registry.addMapping("/**") .allowedOrigins("*") .allowedMethods("GET", "POST", "PUT", "DELETE", "HEAD", "OPTIONS"); } }LikeLike